China Painting Page 5

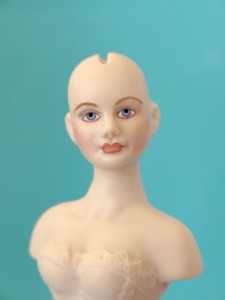 Congratulations on your 3rd firing!
Dannie is really taking on a personality!
Let’s Move On!.
Well, we got the pupils all in order!
Time for making those eyes “pop”
This will be like make-up. Something I never leave home with out, lol
We don’t want to over do this, but she definitely
needs some definition to her eyes.
We will now go back and build up the eye lines, and add some lashes.
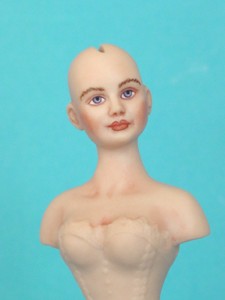 First, let’s go in and shade around the nostrils and ear crevices.
Just a tiny bit!
This should be very subtle.
Use cheek blush thinned with medium and gently shade in and around the nostrils,using the medium to blend it gradually.
It should look like shadows, and not like a nosebleed
Add some cheek blush and area medium over the entire ear surface and pounce it with a swab to blend it.
Let’s blush her neck, chest and shoulder area.
Try to imagine where the shadows would fall in a real photo, and add small bits of cheek blush to those areas.
Pounce with a cotton swab to blend.
Next critical step: Redefining the upper and lower eye lines.
It is super important that you keep these lines very fine, crisp and right on top of each other.
China paints are somewhat translucent if you apply them in thin layers.
In order to build up the color and most importantly the depth, the colors must layer directly on top of each other.
Reapply a thin coat of brown to the upper eye line If necessary re-apply a thin line of your red mixture to the lower eye line.
Use red paint mixed with a bit of brown to paint a fine line in the crease of the eyelid.
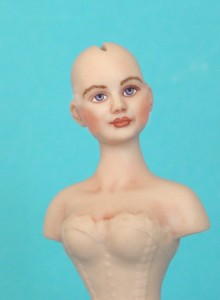 Dannie will now get some tiny eyelashes. We need to make a decision here.
If you want to give her a deeper eyelid crease then now would be the time to take some red/brown paint and carefully add a fine line to the crease area.
Hint: If you choose this route, now would be the time to fire again, as it might affect the crispness of the lashes.
Load 10/0 with dark brown paint mixed with some black and some Line Medium. Carefully add tiny hairs at an angle. Start at the outer edge of the eye and feather them out towards the outer brow line. Keep reloading the brush between each eyelash.
Each eyelash should get gradually shorter as you continue towards the center of the eye.
I usually only go about halfway through the eye line.
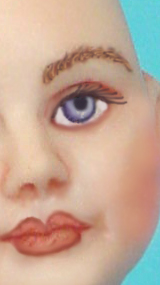 OKAY!!!! You know what’s coming!
This is one area where you WILL have to keep removing eyelashes until you get
them right. I paint many sets before
I feel somewhat satisfied
and even then I never think
they are right, lol
Time To Fire Again!
Fire to cone 018 according to kiln mfg instructions
Hey! One more page! Follow me by clicking on next page! You can do it!
Back Next Page
© Gina C. Bellous 2001 – 2015 – All Rights Reserved
This tutorial is for your personal use only.
NO portion of this tutorial may be
reprinted without permission,
copied for sale, or to be taught as your own.
Thank you for your cooperation
Enjoy!
