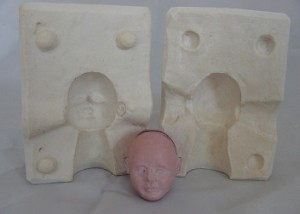
Miniature Doll Mold Making Tutorial
Making A Miniature Doll Plaster Mold
“Molding Melissa”
Basic Instructions For Making A Plaster Mold
This should help to clarify some of the “Mysteries of Mold Making!”
Have fun!
Supplies
-
Finished Sculpture
-
Pencil
-
Plaster – Potters # 1 (Preferred) (or plaster of Paris)
-
Mold Release
-
Baby powder
-
Spoon
-
Oil based modeling clay
-
Dark Marker
-
Small sheets of acrylic plastic (or pieces of mat board)
-
Water
-
Soft flat paint brush
-
Disposable Plastic Container
Be sure to have all supplies on hand before you begin.
Lay the finished sculpture. (in this case, Melissa’s head) on a hard surface. Secure the sculpture with a small ball of oil based clay on the back of the head. Be sure the sculpture is at a 90 degree angle to the table surface. This will insure the best mold lines when tracing around the sculpture. Use a razor blade to remove the wood around the bottom few inches of the pencil, or you can use an actual pencil lead for this process.
Next
© Gina C. Bellous 2001 – 2014 – All Rights Reserved
This tutorial is for your personal use only. NO portion of this tutorial may be reprinted without permission, copied for sale, or to be taught as your own. Thank you for your cooperation Enjoy!


