Cold Porcelain Miniature Flower Tutorial – Page 5
Basic “Cold Porcelain”
Miniature Flower Making Tutorial
Making the flowers – Part 4
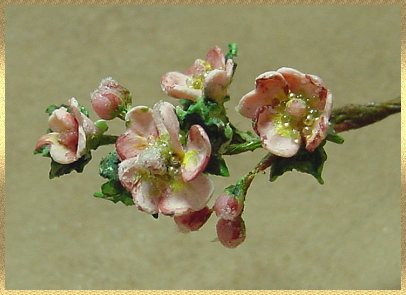
1/12th scale Apple Blossoms
This will be our final process. We will paint the fine details on the
flowers and leaves.
You will need a very fine 18/0 outliner brush, acrylic paints, water, & clear no hole beads
A magnifying lamp will be helpful if you find it difficult to see tiny things well.
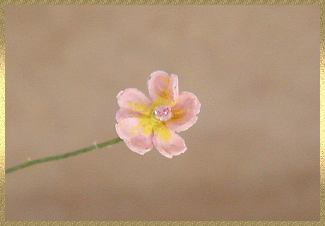 Be sure to water the paint down.
We want it to go on as a wash and not become chunky on such a delicate flower.
Mix yellow with some beige to tone it down a bit.
Add a wash around stamen on center of petals.
 Use water downed burgundy to carefully go along some of the outer edges of the petals.
This is where a photo or live flower model come in handy.
Apple blossoms have random edges of color, but not all
over.
Use a tiny bit of water to help blend the paint.
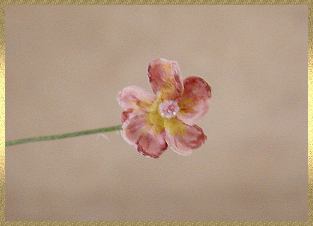 Look how lovely and realistic the petals have become.
Keep the paint simple.
Don’t over do it!
 Let’s not forget the back.
Make tiny radiating lines on the petals with burgundy & some rose paint.
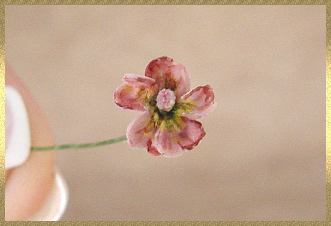 Now it is time for even more detail.
This will give the tiny flower even more depth!
Use medium green mixed with dark brown and
put the finest line around the stamen very close to the center of the flower.
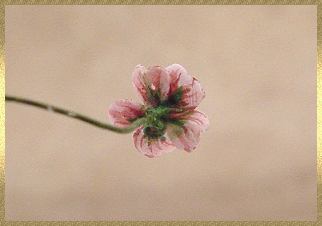 Lets’ not forget the back of the flower.
Paint the pointed parts of the petals green and make tiny triangular shaped areas to simulate the tiny leaves that often surround the base of a flower.
Amazing effect!
 Add some tacky glue around the center of the flower very
close to the stamen.
Use a toothpick or the pointed end of your ball stylus to add some tiny, clear, no hole beads around the center of the flower.
When this dries, it will really sparkle like the sample in the picture at the top of the page.
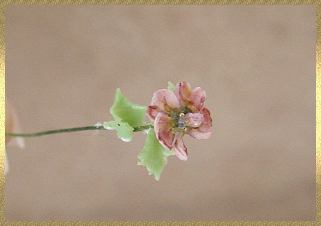 Now it’s time to add some leaves.
I like to put them on first and then paint them.
Use the ball stylus to shape and cup the
leaves just like we did with the petals.
Dip the stems of them in tacky glue and add them to the wire stem randomly around the flower.
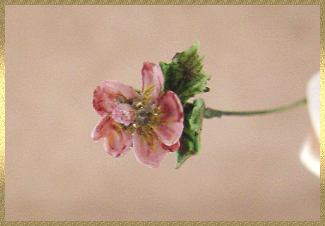 Use several thin washes of the three green paints along with the dark brown and even a bit of burgundy.
Keep the washes light and go back and add more coats as needed. You can paint the leaves while they are still wet or wait until they dry. Either way works. The paint blends a bit nicer on the slightly damp leaves.
That’s it! You made an Apple Blossom.
If you want to make the buds, just use a dark color thread.
Dip the end in glue and add a tiny round ball of med. pink clay to the end.
Let dry. Cut the thread shorter and twist 2 or
three buds together and secure with glue.
Add the painted details like we did with the flowers.
You can brush the tips of the buds with
glue and dip into the crystal snow to give them a tiny bit of sparkle.
Back
Thank You so much for joining me!
If you have any questions please Email me by clicking on Contact above.
© Gina C. Bellous 2001 – 2015 – All Rights Reserved
This tutorial is for your personal use only.
NO portion of this tutorial may be
reprinted without permission,
copied for sale, or to be taught as your own.
Thank you for your cooperation
Enjoy!

