Miniature Doll Mold Making Tutorial – Page 2
“Molding Melissa”
Basic Instructions For Making A Plaster Mold
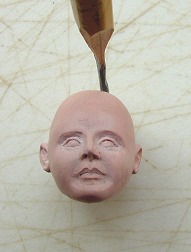 Lay the finished sculpture.
(in this case, Melissa’s head)
on a hard surface.
Secure the sculpture
with a small ball of
oil based clay on the
back of the head.
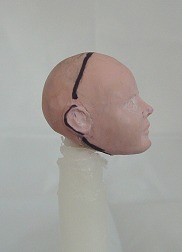 Hold pencil vertical to the
sculpture. (You can see this in the photo above). Press pencil
lead gently against sculpture and carefully run it
around the sculpture. Check to see that pencil
lines show up all around the sculpture.
I have used a back permanent marker to define and darken the lines.
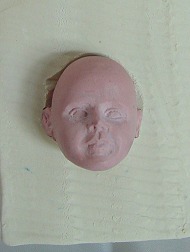 A nice size slab of oil base
clay has been scooped out
where the back of the
head will rest.
Again, it is of utmost
importance to keep the sculpture
at a 90 degree angle
to the base of clay.
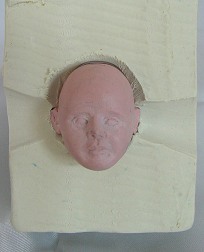 Here is an overhead
view of the head with
the ear areas
scooped out.
I find it easier to scoop
out the clay rather
than try to mold it
around the head.
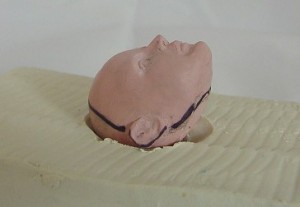 Here is a side view of
the head in the clay. By
scooping out of the clay
it will save time trying
to add so much clay
to the mold.
Notice the right angle
of the sculpture.
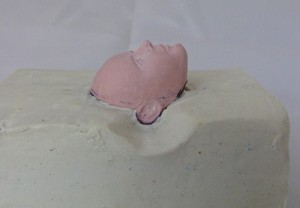 The Clay has now been added
around the remaining
areas of the head, coming
up to the dark marker
lines all around the sculpture.
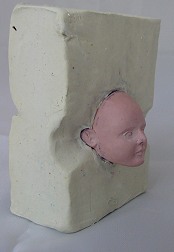 Here is another angle
of the clay base we have
created around the sculpture.
Now is the time to carefully smooth the
clay around the head and be sure
it comes up to the lines.
Back Next
© Gina C. Bellous 2001 – 2012 – All Rights Reserved
This tutorial is for your personal use only.
NO portion of this tutorial may be
reprinted without permission,
copied for sale, or to be taught as your own.
Thank you for your cooperation
Enjoy!
