Miniature Doll Mold Making Tutorial – Page 4
“Molding Melissa”
Basic Instructions For Making A Plaster Mold
Pouring the Plaster
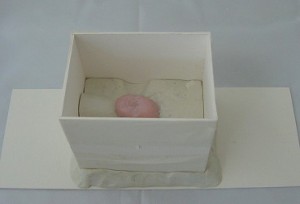
 Melissa has now been “boxed up”.
A roll of clay has been added around the base of the box to insure that no plaster will leak out and make a mess.
A thin layer of Mold Release has been brushed/sprayed on !
DON’T FORGET THIS STEP!!!or your sculpture will get stuck in the plaster. As a last resort you can use WD-40 as a release It may cause discoloration to the plaster but works fine for a test mold.
 Fill a disposable container about 1/3 full with cold water.
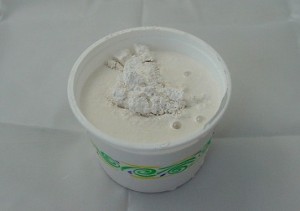
Add plaster gradually to the water. Keep adding the plaster to the water until it no longer sinks below the water but mounds up on top. Tap it a bit to get the water to absorb the last bit of plaster. With a spoon GENTLY fold the plaster together until it is somewhat smooth. Do not stir it. It should be thick like
a heavy whipped cream , similar to Sour Cream that has been stirred.
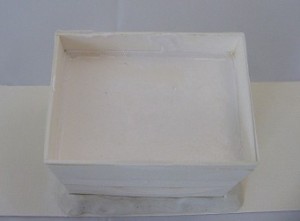
 Gently spoon small amounts of this thick plaster mixture around the sculpture. When you get to the face, use a soft brush to brush some of the plaster over the face. This will help with air bubbles that may get caught on the face. Continue spooning plaster into the box until it is almost full. Tap the box several times to help release the air bubbles trapped under the surface. You can also use a vibration table or device if you have one. Keep doing this and blowing on the surface.
You can also spray a light mist of WD_40 or water on the surface to break the air bubbles. Once you are satisfied with the bubbles being out, do NOT shake any more.
 Leave the plaster to sit for a good amount of time.
Plaster will go through a chemical change. It is really quite amazing! It will get very hot as it sets up. This is a critical time for the plaster. If it is not fresh plaster, it may not heat up
enough to properly set up hard. Be sure to let it cool completely. This can take more than 1 hour or so. When the plaster is ready, use an exacto knife to cut one corner of the taped edge. Remove the boards. Carefully pull on the clay bed to separate it from the plaster mold.
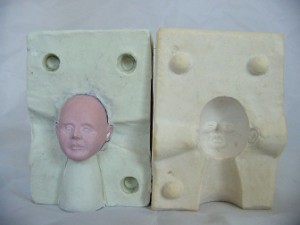
If you have done well, the mold
should release easily from the sculpture
and the sculpture should remain
in the clay bed!
SUCCESS!
Okay, now on to the final steps. Let’s create the other half of the mold
This will be one of the most challenging steps, but super rewarding!!!!
Back Next
© Gina C. Bellous 2001 – 2012 – All Rights Reserved
This tutorial is for your personal use only.
NO portion of this tutorial may be
reprinted without permission,
copied for sale, or to be taught as your own.
Thank you for your cooperation
Enjoy!
