>Now it is time to use the patterns and cut them from fabric.
You will need:
- Aileen’s “STOP Fray” or “Tacky Glue”
- Needle Tool
- Extra Sharp Scissors
- Hot iron to press fabric
- Hard lead pencil
The Fabric Parts above have each been carefully sealed with Aileen’s “Stop Fray”
- Be sure to press your fabric so it is perfectly smooth and wrinkle free
- Use a hard lead pencil to carefully trace around the pattern onto the wrong side of the fabric.
- You can double or quadruple the layers of fabric if you need to cut out more than one piece of the same pattern. This way you are only cutting it out one time.
- Use VERY sharp scissors to carefully cut just inside the line of fabric. This is done to keep any pencil lines off of the cut out pieces.
- Use Aileen’s “STOP Fray” or Tacky Glue to seal the edges of each piece. I use a needle tool dipped in the product and go around each edge very carefully.
- Lay the sealed pieces on wax paper to dry.
- Don’t skip this step. It is super important if you want to have a very neat & clean finished costume.

>Stephanie Gets Her Sailor Dress!
The first step is to make a simple pattern for the sailor dress. I use normal paper to make the initial pattern and then transfer it to card stock to make it sturdy and easy to trace around.
I start by studying the dress in the photo. It is a simple classic & timeless sailor type dress. It consists of a yoke, slight puff sleeves, a collar & flare skirt that according to the customer is above the knee. There will also be embellishments of white cuffs on the sleeves, a white insert in the yoke and a red “tie’ and red trim. The Collar will also be white trimmed in red.
You can either lay the doll down on paper and trace around her to get an approximate size and shape of the pattern or you can fold a small piece of paper in half and just “eyeball” the pattern.
I initially make the pattern without the seam allowances and add them in later in the final draft. You can see in the photo that the length is also longer than needed, but that is not important at this time.
Here you can see that I have altered the pattern to fit Stephanie. I lowered the “V” in the neckline and added the seam allowances I think I will need.
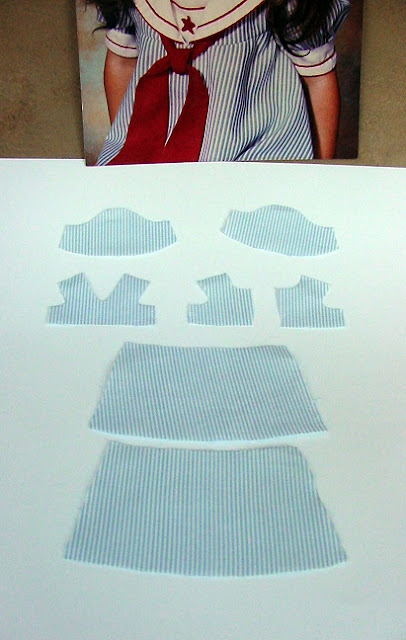
I have come up with basic patterns for the dress that I think will work.
Pictured from Left to Right:
Bodice back, Bodice front, Collar, Skirt & Sleeve.

Stephanie Gets Her Sailor Dress!
Let’s get to start costuming these miniature portrait doll sisters. The first step is to make a simple pattern for the sailor dress. I use normal paper to make the initial pattern and then transfer it to card stock to make it sturdy and easy to trace around.
I start by studying the dress in the photo. It is a simple classic & timeless sailor type dress. It consists of a yoke, slight puff sleeves, a collar & flare skirt that according to the customer is above the knee. There will also be embellishments of white cuffs on the sleeves, a white insert in the yoke and a red “tie’ and red trim. The Collar will also be white trimmed in red.
You can either lay the doll down on paper and trace around her to get an approximate size and shape of the pattern or you can fold a small piece of paper in half and just “eyeball” the pattern.
I initially make the pattern without the seam allowances and add them in later in the final draft. You can see in the photo that the length is also longer than needed, but that is not important at this time.
Here you can see that I have altered the pattern to fit Stephanie. I lowered the “V” in the neckline and added the seam allowances I think I will need.
I have come up with basic patterns for the dress that I think will work.
Pictured from Left to Right:
Bodice back, Bodice front, Collar, Skirt & Sleeve.

>Stephanie Gets Her Sailor Dress!
The first step is to make a simple pattern for the sailor dress. I use normal paper to make the initial pattern and then transfer it to card stock to make it sturdy and easy to trace around.
I start by studying the dress in the photo. It is a simple classic & timeless sailor type dress. It consists of a yoke, slight puff sleeves, a collar & flare skirt that according to the customer is above the knee. There will also be embellishments of white cuffs on the sleeves, a white insert in the yoke and a red “tie’ and red trim. The Collar will also be white trimmed in red.
You can either lay the doll down on paper and trace around her to get an approximate size and shape of the pattern or you can fold a small piece of paper in half and just “eyeball” the pattern.
I initially make the pattern without the seam allowances and add them in later in the final draft. You can see in the photo that the length is also longer than needed, but that is not important at this time.
Here you can see that I have altered the pattern to fit Stephanie. I lowered the “V” in the neckline and added the seam allowances I think I will need.
I have come up with basic patterns for the dress that I think will work.
Pictured from Left to Right:
Bodice back, Bodice front, Collar, Skirt & Sleeve.

>Stephanie & Jocelyn Get Their Pretty Underthings.
Finally the poor gals have gotten their underthings. I feel it is so important to make sure the dolls are properly attired from the bottom up so to speak. Attention to every detail is of utmost importance. I remember when I would do doll shows and the first thing people would do was turn the dolls upside down and look under their clothing.
Here is a photo of the underclothing that Stephanie & Jocelyn we costumed in. They each have embroidered cotton undershirts with rows of vintage cotton lace ruffles.
This way when someone looks under their little dresses they will see lovely cotton ruffles. So nice & girly!

>Hey all,
Sorry for the delay. I had to get more orders out. Still shipping some as I type this.
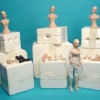
It is now time for Stephanie & Jocelyn to be costumed. Each girl will be dressed in matching tiny blue & white pinstripe sailor dresses with white & red trim. They will also have white knee socks & leather Mary Jane type shoes.
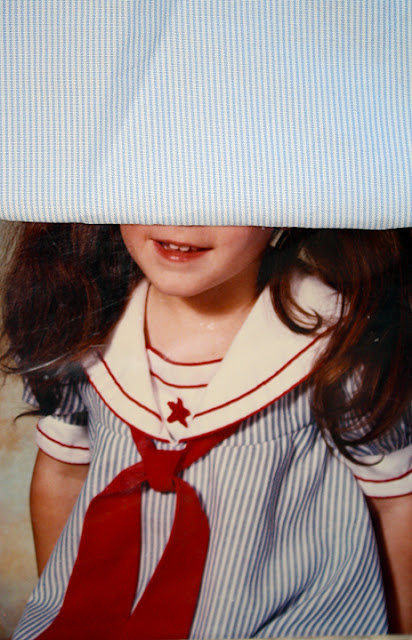
I was lucky to find a very fine cotton pinstripe that will be perfect for their tiny dresses:
That’s little Stephanie hiding under the fabric ?


