>Someone New – Chantelle

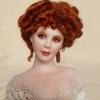
>I had my camera out today, so I couldn’t resist giving you a sneek peek of “Chantelle”.  She will be a lovely lady in a fancy gown.  I love her dark red hair, but I have always had a thing for redheads!

Chantelle


>Finishing up some orders and then some FUN stuff!

>Hi All,
     It has been awhile since I posted.  I have been working like crazy to finish up my orders!  If your ordered a Victoria, and haven’t received her, the rest of the orders will be going out either Monday or Tuesday!  I appreciate every one’s patience.  I got a bit behind during the holidays.  If you ordered other dolls, they are also going out by the end of next week or beginning of next.

    Stay tuned, I will have some special ladies to show!

>Happy Halloween Time!

>Here are some great antique photos I found online:

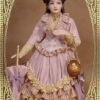
I especially loved this “Bat Costume”  Awesome detail.  Look at her shoes too!

This was a photo from a Masquarade Ball

New Monthly Special October 2011

Limited Quantity – Victoria – Painted Doll Kit of the Month
$45.00 – Includes Painted Porcelain, Half Arms & Half Legs with heels

>The Portrait Sisters are Finished!

>Stephanie & Jocelyn are finally finished!  It has taken awhile to get them done in between all of the other things I had going on! 

JOCELYN
?
STEPHANIE
In the future when I create portrait dolls I will only be doing them in polymer clay.  It is very difficult to do the dolls in porcelain.  It is unforgiving.  You cannot go back and change anything in the sculpture once it is fired.  I see things I would change now, but I cannot.  All in all they are cute little girls that stand between 3″ & 4″ tall.  Very tiny girls!

>? Portrait Sisters ? Collar, Cuffs & Fun Stuff!

>Now the costuming get to be a bit fun.  I love the small details as they add realism to the tiny dolls.

Materials:

  • Fine White  Cotton Fabric
  • Wonder Under Fusible Webbing
  • Aileen’s Tacky Glue
  • Sharp Scissors
  • Red Silk Ribbon & Silk Cord
  • Hard lead pencil
  • Needle Tool

I had to hand dye the silk cord trim & silk ribbon as I didn’t have any in red.  I also dyed some antique trim but as you can see in the photo, it came out a muted shade of red.  It will be perfect for another project, but not this one.

I used Jacquard Acid Dye, it is perfect for silk and feathers. You can see my Feather Dying Tutorial here: Feather Dying Tutorial
Following the directions for the fusible webbing, fuse 2 pieces of fine cotton batiste together.  This will add rigidity to the fabric as well as keep it from fraying.  Do not skip this step.
In this next photo you can see how to trace around the pattern with a hard lead pencil
Carefully cut around the pencil lines as smoothly as possible.  Be sure to cut inside the lines so there won’t be any pencil marks on the actual collar.  Sharp scissors are a must!
Here you can see the cut out collar.  Notice the smooth clean edges and no pencil marks. Because the fabric has been fused together it will not fray.  Super helpful in maintaining  a clean and flat look that will add to the realism of this small scale.
*DON”T throw away the piece that you cut from the center of the collar, it is perfect for making the inset yoke under the collar.
Using the Tacky Glue and a needle tool, carefully apply a very thin bead of glue to the outside edge of the collar only!  Slowly lay the red silk cording on the glue along the edge.  Try to keep it as straight as possible.  Repeat this on the edges for a second row of red trim trying to keep the cord equally spaced on all sides.  Add 2 rows of red silk cording to the top of the yoke as well.  When the collar is dry, you will want to turn the neck edge under so there are no raw seams visible.
Now the magic really starts to happen!  I love this part!
Carefully glue the yoke to the open “V” area of the neckline.  Notice how nicely the fusible webbing keeps the edges clean and from fraying.
Ahhhh!  Look at little Jocelyn now!  She is really coming to life!  Red silk ribbon is tied in a tiny knot and added to the bottom of the collar in the front.  You can see how neat and clean the collar is on the top side as well as underneath!
You can see that tiny matching cuffs have been added to the edges of the puff sleeves.  This was done by cutting long this strips of fused fabric and adding the 2 red stripes of red silk cord.  I used the photos of the girls as my guide in how they should look.?
NEXT:  The girls will get their socks & shoes and final hair styling & hair decorations and be off to their new home!